P2W2: Planning Ahead
back |
With the island mapped out and basic survival needs addressed, the group realized they needed a proper shelter. Their temporary camp near the wreckage wasn’t sustainable, too exposed to the elements and lacking organization.
The commander, the most practical of the group, decided to take charge. 'We’re building a shelter big enough for all five of us, but we need a plan,' she said. With a stick in hand, she began sketching a floorplan in the sand. |
| First, we need to figure out what we need in the shelter,’ the commander said. ‘How much space do we need for each person? Where do we keep food and tools? And how do we make sure it’s safe from rain and wind?’
The group agreed on the essentials:
|
 |
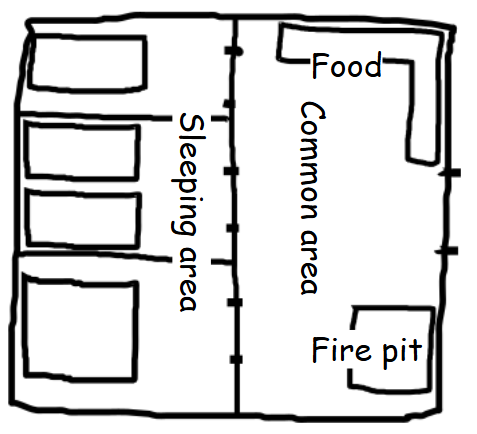
| The commander sketched a simple rectangular hut with two zones:
Sleeping area: Divided into three spaces. One for the couple and two separate for the others. Common area: For storing food, tools, and firewood, with a small space for cooking under cover. ‘This keeps everything organized,’ she said. ‘We will build it close to the edge of the forest so we have access to materials and shade.' Wait,’ said one of the girls, ‘what happens when it rains? Won’t the common area get wet if it’s near the door?’ |
 |
|
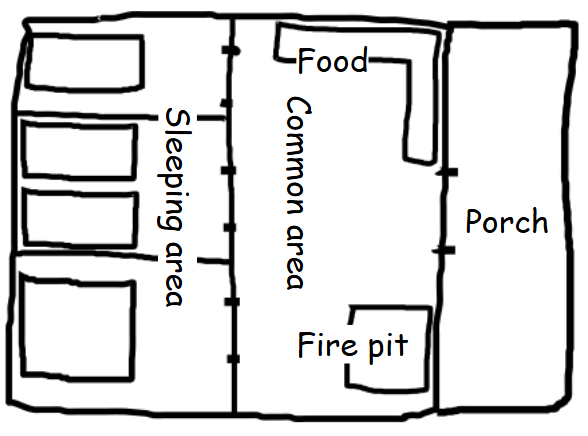
The commander nodded and added a covered porch at the entrance, extending the roofline to protect the storage and cooking areas. ‘This will also give us some space to dry things when it rains,’ she explained. Final Shelter Plan
|
 |
